The SOLIDWORKS sensor tool allows a user to set parameters within a model or assembly that can then be monitored by SOLIDWORKS as your design is developed. If a design change you make results in a deviation outside the limits you specify, then the software will alert you, allowing for the appropriate action to be taken.
The sensors folder can normally be found in the feature manager tree.
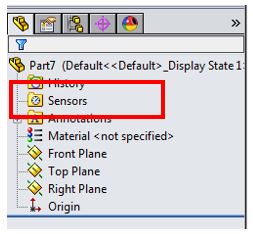
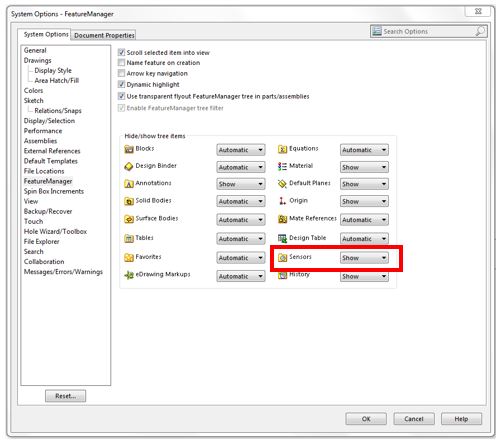
If you don’t have it, you can set it to show in your system options. (see below)
To demonstrate a sensor, we will take a look at an example from the SOLIDWORKS Assembly modelling course.
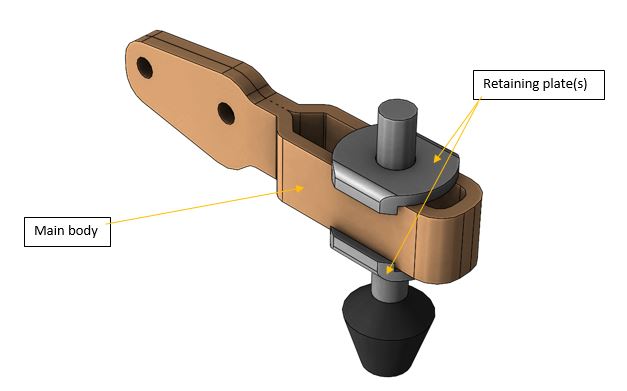
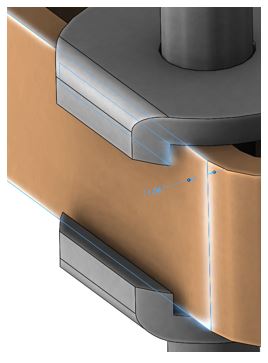
In this design we want to monitor the clearance between the outer face of the main body and the inside face of the retaining plates, so as to ensure product can be easily assembled.
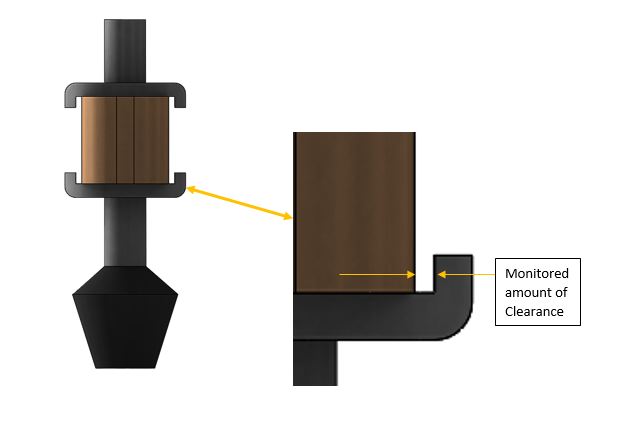
We will use a sensor to monitor the amount of clearance in this area. To do this we must first add a reference dimension. This dimension is what the sensor will reference.
To add a reference dimension, select the smart dimension tool from the sketch toolbar (you don’t need to be in a sketch).
Add the reference dimension between the outside face of the main body and the inside face of the retaining plate (the dimension should be shown in grey, denoting it as a reference).
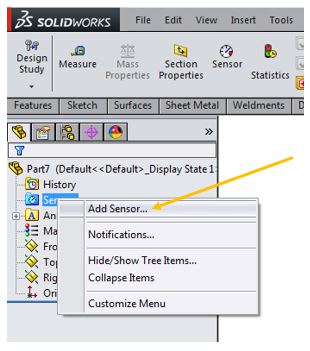
To add a new sensor, right click on the sensor folder in the tree and select “add sensor” from the menu.
The sensor property manager will open (as below). We will now take a look at the parameters which can be set for Sensor types, Properties and Alert
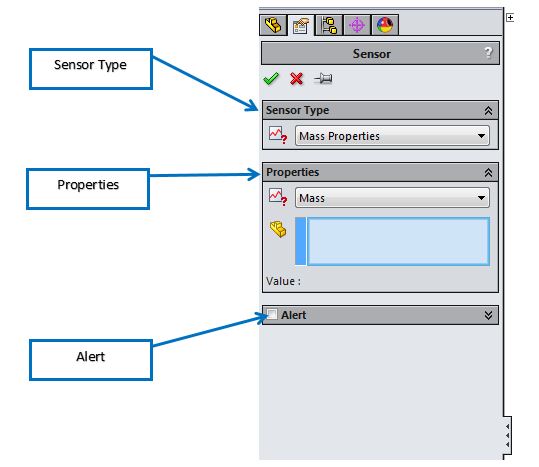
Sensor Type
There are a number of sensor types to choose from including Simulation Data, Mass properties, Dimension and Measurement. A description of each type of sensor is shown below. (Taken from SOLIDWORKS help) For our example we are going to choose dimension from the list of sensor types.

Properties
There are a whole list of properties available for selection. Each sensor type has specific properties relating to it (there are
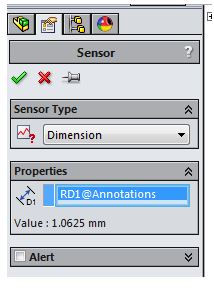
lots of options, so take some time to see exactly what’s available). In our example we will be using a dimension sensor. For the property we simply need to select the reference dimension we added earlier. The value of the selected dimension is displayed.
Alert
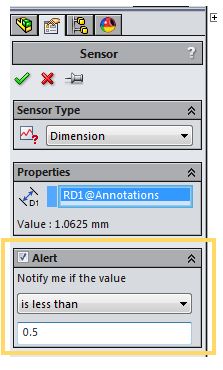
If we wish for SOLIDWORKS to make us aware of any changes made to the dimension we are monitoring then we must tick the alert check box. In here we can choose as to when we wish to be alerted of any changes. In our example we want to be alerted if the value of our reference dimension falls below 0.5mm (see settings in image below).
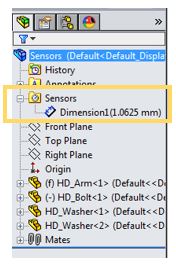
With all the settings made, close the sensor property manager using the green tick and continue with the design. Notice that the sensor folder in the feature tree contains the dimension sensor we just configured.
Open up the retaining plate part and modify the recess from 2mm to 2.6mm. Exit the sketch and update the model.
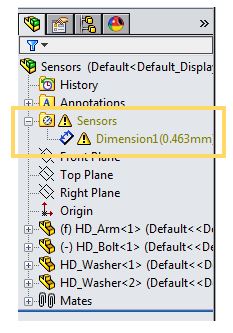
Return to the assembly to review the effects. You will notice that there is now and error in the feature tree.
The sensor has been triggered due to the design change made, resulting in a warning in the feature tree that we can now react to. Relevant changes can then made to ensure the design is in keeping with the sensor values.
The sensors folder can normally be found in the feature manager tree.

If you don’t have it, you can set it to show in your system options. (see below)

To demonstrate a sensor, we will take a look at an example from the SOLIDWORKS Assembly modelling course.

In this design we want to monitor the clearance between the outer face of the main body and the inside face of the retaining plates, so as to ensure product can be easily assembled.

We will use a sensor to monitor the amount of clearance in this area. To do this we must first add a reference dimension. This dimension is what the sensor will reference.
To add a reference dimension, select the smart dimension tool from the sketch toolbar (you don’t need to be in a sketch).
Add the reference dimension between the outside face of the main body and the inside face of the retaining plate (the dimension should be shown in grey, denoting it as a reference).

To add a new sensor, right click on the sensor folder in the tree and select “add sensor” from the menu.

The sensor property manager will open (as below). We will now take a look at the parameters which can be set for Sensor types, Properties and Alert

Sensor Type
There are a number of sensor types to choose from including Simulation Data, Mass properties, Dimension and Measurement. A description of each type of sensor is shown below. (Taken from SOLIDWORKS help) For our example we are going to choose dimension from the list of sensor types.

Properties
There are a whole list of properties available for selection. Each sensor type has specific properties relating to it (there are
lots of options, so take some time to see exactly what’s available). In our example we will be using a dimension sensor. For the property we simply need to select the reference dimension we added earlier. The value of the selected dimension is displayed.

Alert
If we wish for SOLIDWORKS to make us aware of any changes made to the dimension we are monitoring then we must tick the alert check box. In here we can choose as to when we wish to be alerted of any changes. In our example we want to be alerted if the value of our reference dimension falls below 0.5mm (see settings in image below).

With all the settings made, close the sensor property manager using the green tick and continue with the design. Notice that the sensor folder in the feature tree contains the dimension sensor we just configured.

Open up the retaining plate part and modify the recess from 2mm to 2.6mm. Exit the sketch and update the model.

Return to the assembly to review the effects. You will notice that there is now and error in the feature tree.
The sensor has been triggered due to the design change made, resulting in a warning in the feature tree that we can now react to. Relevant changes can then made to ensure the design is in keeping with the sensor values.

0 comments:
Post a Comment
Note: only a member of this blog may post a comment.